The allure of homemade butter is undeniable. Imagine a rich, creamy, and flavorful spread, crafted with your own hands, that elevates everything from morning toast to gourmet dishes. While the idea might seem daunting, especially with images of artisanal producers in places like Brittany, France, the truth is remarkably simple: you can create outstanding butter right in your own kitchen using just one core ingredient. This comprehensive guide will show you exactly how to make butter one ingredient, transforming humble cream into a golden delight that rivals the finest store-bought varieties.
Forget complex recipes and specialized equipment. With the right technique and a little patience, you'll discover a culinary secret that’s both satisfying and surprisingly easy. We’ll delve into the secrets shared by culinary experts, including Michelin-starred chef Adam Byatt, whose approach demystifies the process, making gourmet results accessible to every home cook.
Why Make Your Own Butter? The Homemade Difference
Why bother making butter when countless options line grocery store shelves? The answer lies in unparalleled freshness, customizable flavor, and a deep connection to your food. Store-bought butter, while convenient, often travels a long journey and may contain additives or be made from less-than-premium cream. Homemade butter, on the other hand, offers a vibrant, pure taste that simply cannot be replicated.
Chef Adam Byatt, known for his refined modern English fare, embarked on his own butter-making journey to see if he could produce a superior product at a lower cost than the expensive brands he typically reserved for serving with bread. His conclusion? The results were exceptional. When you control the starting ingredient, you control the outcome. This hands-on process not only yields a delicious product but also allows you to imbue it with your personal touch, whether that’s a specific salt content or the infusion of herbs and spices.
Beyond taste, there's an economic factor to consider. While the initial cost of high-quality cream might seem comparable to a block of butter, the resulting buttermilk is a valuable byproduct, adding to the overall value. To explore this aspect further, you might be interested in our detailed analysis: Make Your Own Butter: Is It Cheaper & Better Than Store-Bought?
The Core Ingredient: Selecting Your Cream for Superior Butter
When learning how to make butter one ingredient, that single ingredient — the cream — is paramount. As Chef Byatt wisely states, "Your butter will never be better than the cream you start with." This isn't just a recommendation; it's the golden rule for achieving outstanding results.
What Kind of Cream Should You Use?
- Fat Content is Key: For best results, aim for a cream with a high fat content. Double cream (at least 47% fat), heavy cream, or whipping cream (typically 35% fat or higher) are ideal. The higher the fat percentage, the faster and more efficiently your cream will transform into butter. Lower fat creams (like half-and-half) simply won't work for butter making.
- Quality and Source: Seek out the highest quality cream you can find. Local dairies, organic options, or those from grass-fed cows are often superior. Cream from grass-fed cows, in particular, tends to have a richer flavor and a more vibrant yellow hue, thanks to beta-carotene in their diet.
- Raw vs. Pasteurized: While most home cooks will use pasteurized heavy cream, some enthusiasts, like those at Food Renegade, champion the use of raw cream, citing its unique flavor profile and potential probiotic benefits. If you have access to fresh, safe raw cream, it's an exciting avenue for experimentation.
- Sweet or Sour: You can make butter from either sweet cream (fresh, uncultured cream) or slightly soured cream. Sour cream butter, often referred to as cultured butter, has a tangier, more complex flavor profile that many find appealing. If your cream has slightly soured but isn't spoiled, it can still be perfectly suitable for butter making.
Ensure your cream is well-chilled before you begin. While not ice-cold, a good chill will help it whip more effectively. Avoid cream that is at room temperature, as it can take much longer to reach the butter stage.
Essential Tools for Crafting Homemade Butter
One of the beauties of learning how to make butter one ingredient is that you likely already own most of the necessary equipment. You don't need highly specialized gadgets; common kitchen tools will suffice.
The Must-Have Equipment:
- Stand Mixer with Whisk Attachment: This is Adam Byatt’s preferred method for its efficiency and hands-free operation. The whisk attachment provides consistent agitation, crucial for separating the butterfat.
- Alternatively, a Food Processor or High-Powered Blender: If you don't have a stand mixer, a food processor with a blade attachment or a high-speed blender can also effectively turn cream into butter. They are generally faster than hand mixers but can be more prone to splashing.
- Large Bowl: Essential for containing the cream and later for rinsing the butter. If using a hand mixer, ensure it's a deep bowl to minimize splattering.
- Plastic Wrap or a Lid: Crucial for controlling splashes once the cream starts to separate into butter and buttermilk. A significant amount of liquid will be expelled rapidly.
- Fine-Mesh Sieve or Colander: Lined with cheesecloth, this will be used to strain the buttermilk from the butter solids.
- Spatula or Wooden Spoon: For scraping down the sides of the bowl and for pressing the butter.
- Bowl of Ice Water: This is vital for rinsing the butter. The cold water helps firm up the butter and effectively washes away residual buttermilk.
- Fine Sea Salt (Optional but Recommended): For seasoning your butter to taste.
Step-by-Step Guide: How to Make Butter One Ingredient
Now for the main event! Follow these simple steps to transform your chosen cream into delicious, homemade butter. This method is based on the efficient techniques favored by culinary professionals.
The How-To:
- Prep Your Cream and Equipment:
- Ensure your cream is well-chilled.
- Attach the whisk attachment to your stand mixer. If using a food processor, use the S-blade.
- Place your chosen cream into the mixer bowl. Don't fill it more than halfway to allow for expansion and reduce splashing.
- Have your plastic wrap, sieve, and ice water bowl ready.
- Begin Whipping:
- Start your stand mixer on a medium speed. If using a food processor, use a continuous pulse or medium speed.
- The cream will go through several stages:
- Whipped Cream: First, it will thicken into soft peaks, then stiff peaks, just like making whipped cream. Don't stop here!
- Over-Whipped Cream: Continue whipping, and the cream will begin to look grainy and yellowish. The texture will change from fluffy to clumpy and dense.
- The Breakthrough (Separation):
- This is the most exciting part! As you continue whipping, the butterfat solids will suddenly separate from the liquid buttermilk. You'll hear a distinct sloshing sound, and you'll see pale yellow chunks of butterfat in a milky liquid.
- Important: At this stage, cover your mixer with plastic wrap to contain the inevitable splashing of buttermilk. The separation can be quite vigorous!
- Continue whipping for another minute or so after the separation occurs to ensure maximum butterfat extraction.
- Drain the Buttermilk:
- Remove the whisk attachment (or blade).
- Place your fine-mesh sieve (preferably lined with cheesecloth) over a separate bowl.
- Pour the contents of your mixer bowl into the sieve, allowing the buttermilk to drain away. Use a spatula to press the butter solids gently, encouraging more buttermilk to release.
- Don't discard the buttermilk! This is genuine, fresh buttermilk, perfect for baking, marinades, or making pancakes.
- Rinse the Butter Thoroughly:
- Transfer the butter solids into your bowl of ice water.
- Using your hands or a spatula, begin to knead and fold the butter under the water. You'll notice the water turning cloudy as more buttermilk is squeezed out.
- The goal here is to remove as much residual buttermilk as possible. Any remaining buttermilk can cause your butter to spoil faster and impart an off-flavor.
- Drain the cloudy water and refresh with clean ice water. Repeat the kneading and rinsing process at least 2-3 more times until the water remains mostly clear after kneading. This step is critical for good shelf life and flavor.
- Season and Form (Optional but Recommended):
- Once the butter is thoroughly rinsed, press out any excess water.
- Transfer the butter to a clean bowl. Now is the time to add fine sea salt, if desired. Start with about ½ to 1 teaspoon per cup of cream (which yields about ½ cup of butter), and mix it in thoroughly. Taste and adjust.
- Form the butter into your desired shape – a log, a block, or even individual pats. You can use parchment paper or plastic wrap to help shape and store it.
And there you have it – fresh, homemade butter! For a visual guide and more insights from a pro, you can also refer to Master One-Ingredient Butter: Michelin Chef Adam Byatt's Guide.
Troubleshooting and Tips for Perfect Butter
- Cream Not Separating? This usually means your cream's fat content is too low, it's not cold enough, or you haven't whipped it long enough. Be patient, especially with smaller batches or lower-fat creams.
- Too Much Splashing? Use that plastic wrap! It's messy, but worth it.
- How Long Does it Last? Properly rinsed and salted homemade butter will last about 1-2 weeks in the refrigerator. Unsalted butter has a shorter shelf life, usually about 3-5 days. For longer storage, butter can be frozen for several months.
- Don't Waste the Buttermilk: The byproduct is genuine buttermilk, not the cultured milk product often sold in stores. Use it in baking, for fried chicken, or even to make ricotta cheese.
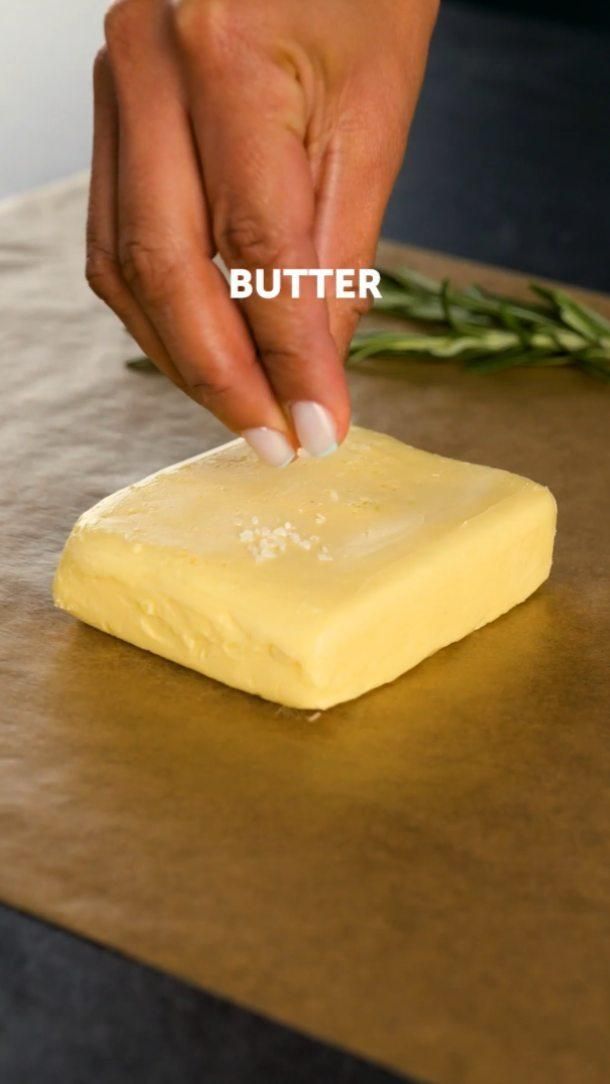
- Flavor Variations: Once you've mastered the basic salted butter, get creative! Try adding fresh herbs (rosemary, thyme, chives), garlic, citrus zest, honey, or even sweet spices like cinnamon for a compound butter.
Conclusion
Making your own butter at home is a rewarding culinary adventure that is surprisingly straightforward. By focusing on that single, crucial ingredient – high-quality cream – and following these clear steps, you can achieve a product far superior to most store-bought options. Not only is the process simple, but the fresh, pure taste of your homemade butter will elevate every meal it graces.
So, next time you're contemplating a trip to the grocery store for butter, consider embarking on this simple and satisfying journey. You now know exactly how to make butter one ingredient, and a world of creamy, flavorful possibilities awaits you in your own kitchen.
