Control Your Kitchen: The Magic of Making Butter with Just One Ingredient
Imagine spreading a dollop of rich, creamy butter on a warm piece of toast, knowing that you made it yourself, from scratch, with absolute purity. This isn't a scene from a bygone era; it's a simple, rewarding reality achievable in your very own kitchen. Forget complex recipes or obscure ingredients. We're here to unveil the secret to mastering your kitchen and creating exquisite homemade butter using just **one ingredient**: heavy whipping cream. This guide will show you **how to make butter one ingredient** at a time, transforming a humble dairy product into a culinary masterpiece in mere minutes. For anyone interested in embracing the joys of making food from scratch, homemade butter is a signature recipe. It’s incredibly straightforward, offering you 100% control over what goes into your spread, free from additives or preservatives often found in store-bought varieties. The process is not only simple and fun but also surprisingly quick, promising a fresher, more flavorful butter that will undoubtedly elevate your everyday meals and baking endeavors. Plus, as a delightful bonus, you'll also yield fresh buttermilk, perfect for enhancing other recipes.The Simplicity of Homemade Butter: Why Just One Ingredient?
At the heart of this incredibly easy butter-making process lies a single, readily available ingredient: heavy whipping cream. This pure dairy product, teeming with fat, is the magic behind the transformation. When agitated vigorously, the fat globules within the cream begin to clump together, separating from the liquid (buttermilk) and coalescing into solid butter. It’s a natural process, allowing you to create a product that is as pure as it gets. Choosing to make your butter with just one ingredient gives you unparalleled control. You dictate the freshness, the texture, and even the flavor profile. There are no hidden emulsifiers, artificial colors, or preservatives to worry about. You’re effectively taking control of a fundamental kitchen staple, ensuring that what you consume is truly wholesome and delicious. This isn't just about making butter; it's about reclaiming a piece of your food sovereignty and enjoying the superior taste and quality that comes with it.Gearing Up: What You'll Need for Your Butter-Making Adventure
Before you embark on your butter-making journey, gathering the right tools and understanding your key ingredient will set you up for success. The beauty of this method lies in its minimal requirements.Essential Ingredient: Heavy Whipping Cream
- Heavy Whipping Cream: This is your star ingredient. For the best results and highest yield, aim for heavy whipping cream with a fat content of at least 36%. The higher the fat content, the more butter you'll extract, and the creamier your final product will be. Always start with cold cream directly from the refrigerator; cold temperatures help the fat globules separate more efficiently.
Key Tools: The Equipment You'll Need
- Stand Mixer with Whisk Attachment: This is the easiest and most efficient tool for making butter at home. The powerful motor and continuous whisking action will do most of the work for you, making the process almost effortless.
- Electric Hand Mixer: If you don't have a stand mixer, a good electric hand mixer is an excellent alternative. Be prepared for a bit more arm strength involved, but it's entirely feasible.
- Large Mixing Bowl: Essential for containing the cream as it whips and for rinsing the butter later.
- Fine Mesh Sieve or Cheesecloth: Crucial for straining the buttermilk from the butter solids. A cheesecloth can be particularly effective for squeezing out every last drop.
- Spatula or Wooden Spoon: Useful for pressing and kneading the butter.
- Bowl of Ice-Cold Water: Absolutely necessary for rinsing the butter thoroughly.
- Clean Chopping Board or Surface: For shaping your finished butter.
- Storage Container: A butter dish, cling film, beeswax wrap, or freezer-safe bags for storing your homemade creation.
Your Step-by-Step Guide to Crafting Creamy Butter
Ready to transform that single ingredient into golden, spreadable goodness? Follow these simple steps to learn **how to make butter one ingredient** at a time, right in your kitchen.1. The Whipping Journey
Pour your cold heavy whipping cream into the bowl of your stand mixer (or a large bowl if using a hand mixer). Attach the whisk and begin mixing at a medium-high speed. The journey from cream to butter involves several fascinating stages:
- Whipped Cream: Initially, the cream will become light and fluffy, forming soft peaks, then stiff peaks, just like regular whipped cream. This stage typically takes a few minutes.
- Curdling/Graining: As you continue to whisk, the cream will suddenly take on a curdled, grainy appearance. It will look like it's "breaking." Don't stop! This is a good sign, indicating the fat is beginning to separate.
- Separation: Keep mixing! Within another minute or two, you'll witness the magical moment when the fat solids completely separate from the liquid. You'll see solid clumps of butter forming in a pool of milky liquid. This liquid is fresh buttermilk. For a quick guide on the timing, check out our article on How to Make Butter: One Ingredient, 10 Minutes Flat.
Pro Tip: Do not stop the mixer during these stages. Consistent agitation is key to encouraging the fat globules to bind together.
2. Separating the Gold (and the Liquid Gold)
Once the butter solids have clearly separated, it’s time to retrieve your prize. Carefully pour the contents of the mixing bowl through a fine mesh sieve or a cheesecloth-lined colander into another bowl. The solids caught in the sieve are your nascent butter, and the liquid collected below is fresh buttermilk. Don't discard the buttermilk! It's a fantastic byproduct perfect for baking, marinating meats, or making fluffy pancakes. Store it in an airtight container in the fridge for up to a week.
3. The Crucial Rinse: Ensuring Longevity and Purity
This is arguably the most critical step for ensuring your homemade butter has a good shelf life and pure flavor. Any residual buttermilk left in the butter will cause it to spoil quickly and can impart an off-flavor. Fill a clean bowl with ice-cold water. Take your butter solids (still in the sieve or wrapped in cheesecloth) and submerge them in the icy water. Knead and squeeze the butter vigorously. You'll notice the water quickly turning cloudy – that's the buttermilk being released. Discard the cloudy water, refill with fresh ice-cold water, and repeat the kneading and squeezing process. Continue rinsing until the water remains completely clear after squeezing the butter. This might take 3-5 changes of water, but it's essential for preventing premature spoilage.
4. Shaping Your Creation
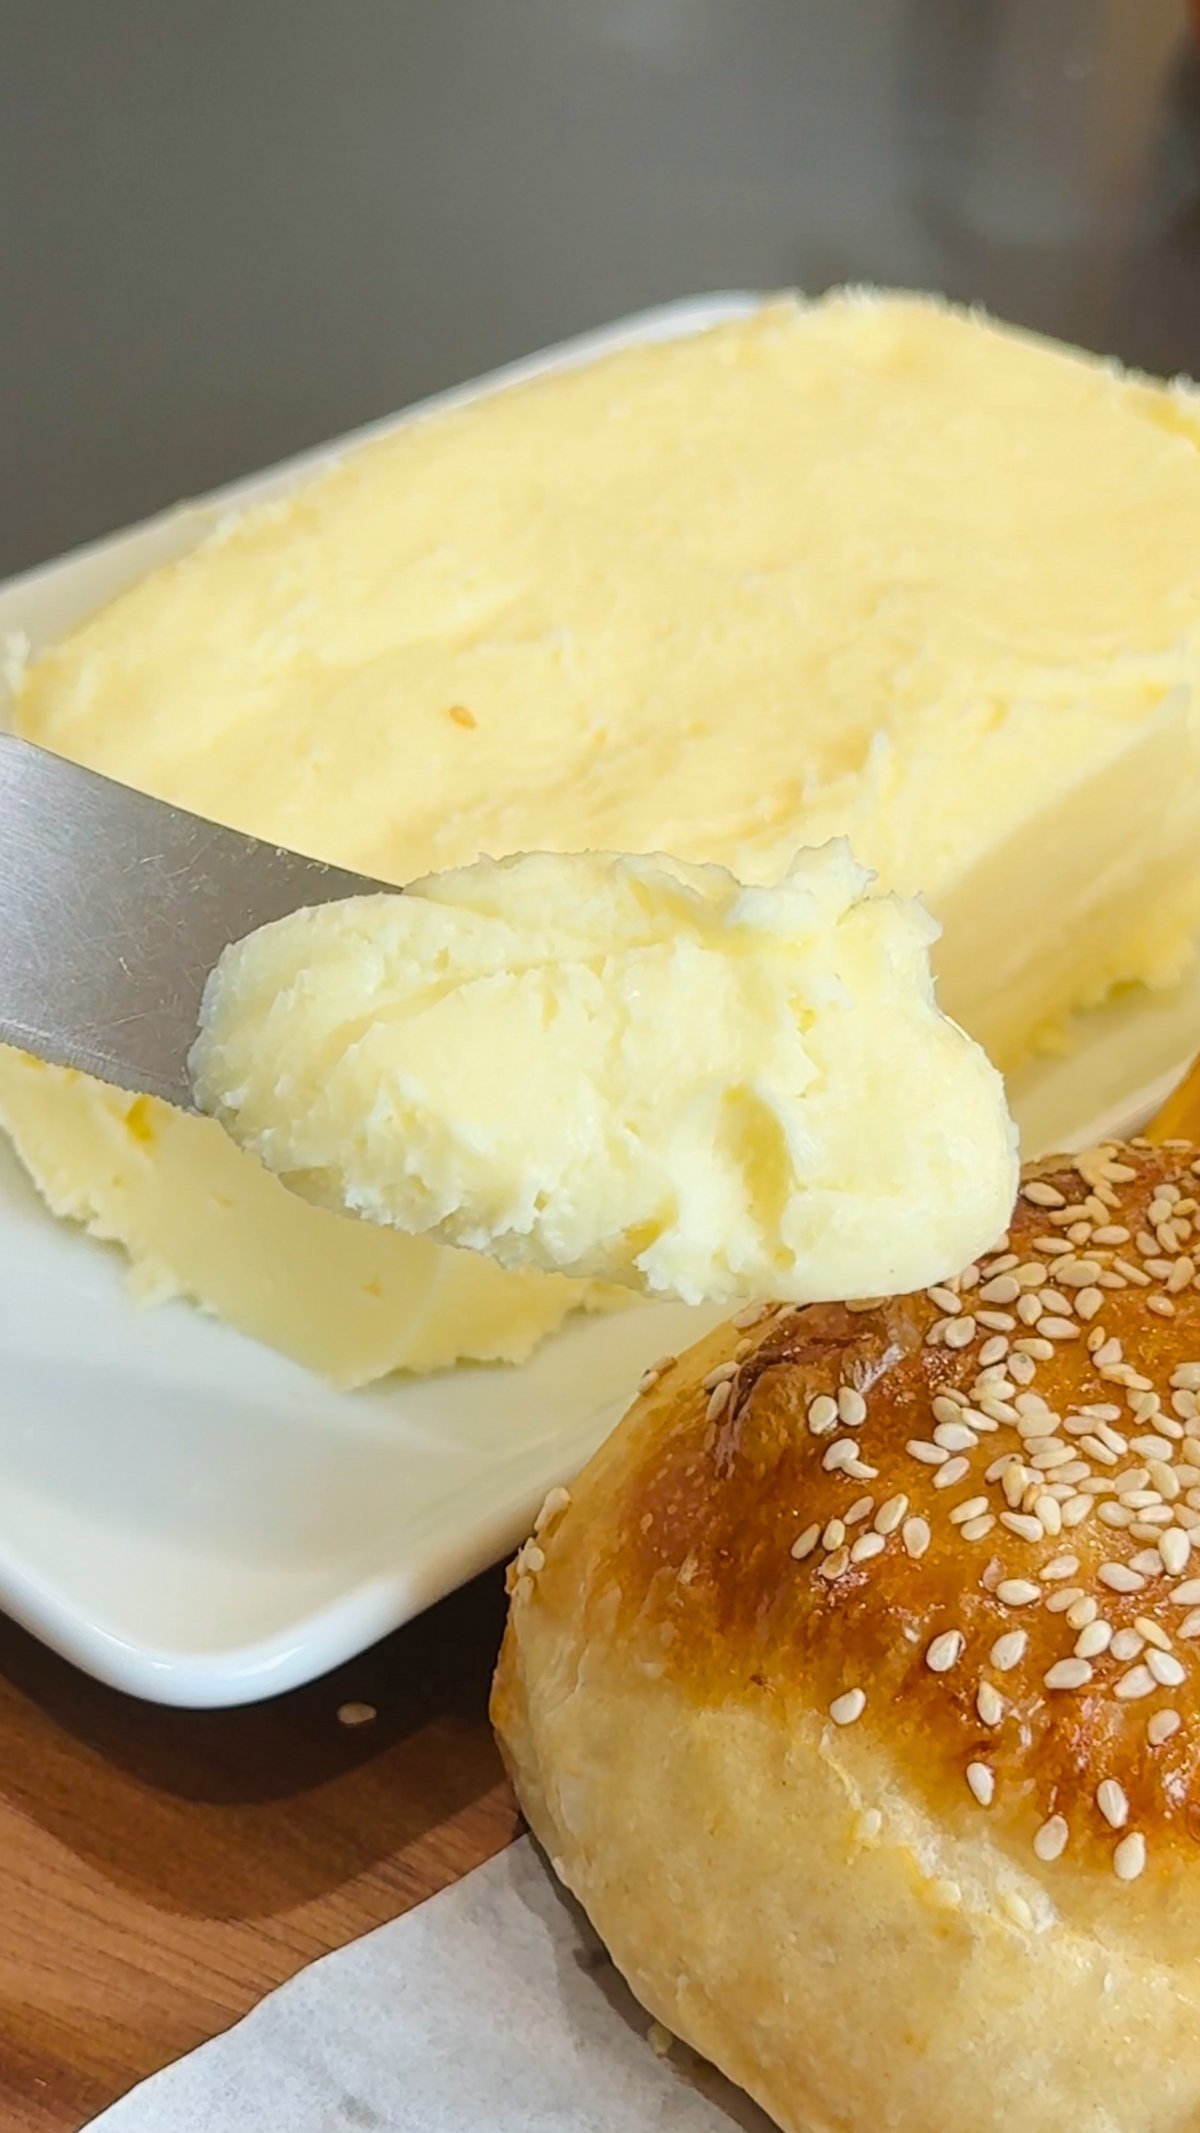
Once your butter is thoroughly rinsed, remove it from the sieve or cheesecloth. Place it on a clean chopping board or a piece of parchment paper. Using your hands or a spatula, knead and press the butter to remove any last bits of moisture and shape it into your desired form – a traditional block, a log, or even individual pats. This tactile process is incredibly satisfying and allows you to compact the butter nicely.
5. Personalizing Your Butter (Optional)
Now comes the fun part: customizing your homemade butter!
- Salted or Unsalted: If you prefer salted butter, gently knead in a pinch or two of fine sea salt to taste. Salt not only enhances flavor but also acts as a natural preservative, extending the butter's shelf life.
- Flavor Infusions: Elevate your butter with fresh herbs like rosemary, thyme, chives, or parsley. Minced garlic, a touch of honey, cinnamon sugar, or even chili flakes can transform plain butter into a gourmet spread. Mix these flavorings in thoroughly at this stage. Our comprehensive guide Easy Homemade Butter: Your Guide to Pure, Fresh Cream offers more inspiration for unique flavor combinations.
6. Storing Your Homemade Delicacy
Proper storage is key to enjoying your fresh butter for as long as possible.
- Refrigeration: Store your homemade butter in an airtight container, such as a butter dish, or wrapped tightly in cling film or beeswax wrap. It will stay fresh in the refrigerator for 1-3 weeks. The exact shelf life depends on the initial freshness of your cream and how thoroughly you rinsed out the buttermilk.
- Freezing: For longer storage, homemade butter freezes beautifully. Wrap it tightly in cling film or beeswax wrap, then place it in a freezer-safe silicone bag or Ziplock bag to protect against freezer burn. Unsalted homemade butter will last up to 6 months in the freezer, while salted butter can last up to 12 months due to salt's preservative properties.
- Thawing: To use frozen butter, simply allow it to defrost overnight in the refrigerator. For quicker thawing, you can use a microwave in short 10-15 second increments, flipping the butter in between.
